
Introduction: Photoshop to Edit Photos
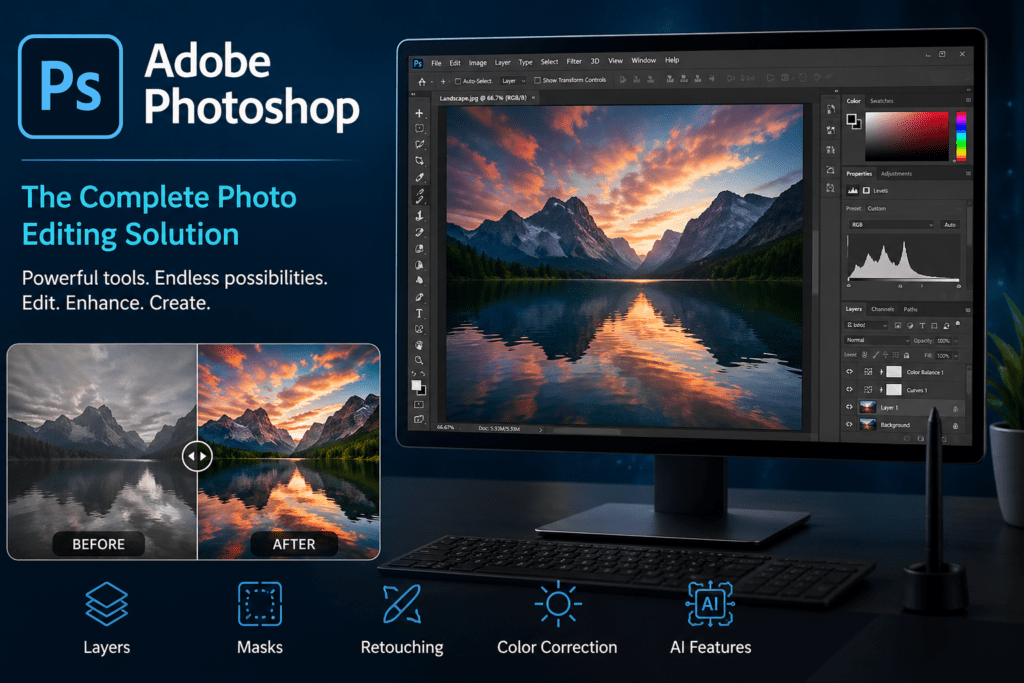
Adobe Photoshop is one of the strongest photo editing software which is widely used throughout the world. So, whether you’re a professional photographer, graphic designer, or an amateur who loves photo editing to use Photoshop to edit Photos, Photoshop has a tool for almost anything you want to do with your pictures.
Photoshop to edit Photos ,Since its inception in 1988, Photoshop has become an industry reference software that has the high-end functionalities of using layers, masks, retouching tools, color corrections, and AI features in enhancing photos. Many edit tools provide limited editing control but Photoshop enables users to have full control over their images, and so has become the preferred application by professionals and enthusiasts alike.
Beginning with the Use of Photoshop to edit Photos
Adobe Photoshop is the most powerful and versatile image editing tool. No matter if you are a beginner or a professional user, it becomes important to have some basic knowledge of Photoshop before jumping into advanced editing techniques. In this section, we will introduce you to the setup process for Photoshop, including the installation and getting to know the interface.
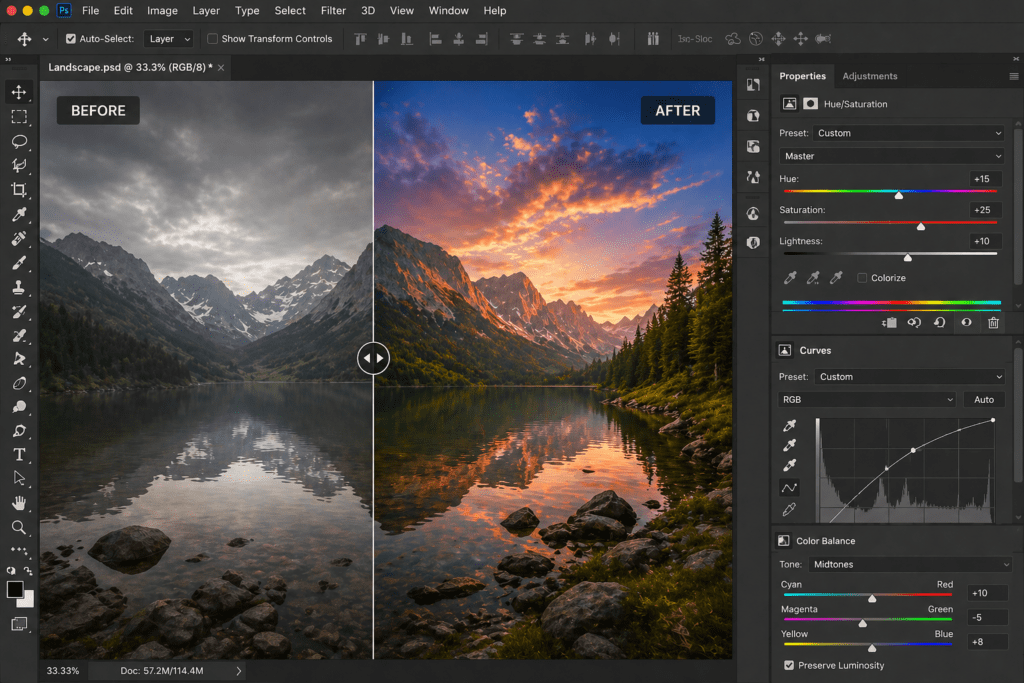
“Master Photoshop to edit photos like a pro! Learn essential tools, techniques, and tips for stunning photo enhancements.”
1. Installation and Setup of Photoshop to edit Photos
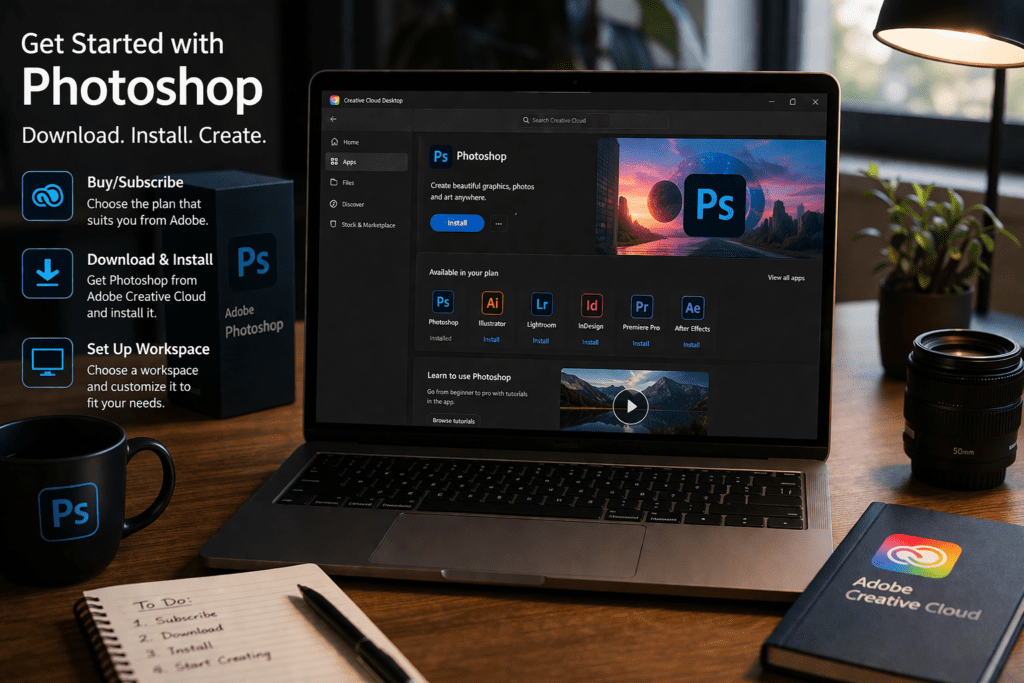
If you have never downloaded Photoshop yet, just follow the steps below.
Buy/Subscribe to Photoshop
Visit the Adobe website for a list of Photoshop subscriptions.
There are various plans offered by Adobe, such as Photoshop on its own, or Adobe Creative Cloud (with some other apps like Illustrator and Lightroom).
Download and Install
When subscription is done, download Photoshop from the Adobe Creative Cloud app.
Follow the installation instructions and, upon completion, launch the program.
Set Up Your Workspace
While first opening Photoshop, there will be various workspace options to choose from.
If you are a beginner, go with Essentials; otherwise, feel free to go with Photography or Graphic Design depending on your needs.
The workspace will allow you to be customized further on.
2. Understanding the Photoshop Interface
Upon launching into Photoshop, one might think the interface unwieldy; once properly broken down, it begins to make sense. Therefore:
Menu Bar- This is located at the top and contains important functions such as File, Edit, Image, Layer, Select, Filter, and more.
Toolbar- Placed on the left side. It contains tools for the basic functions of selecting, cropping, painting, retouching, etc. Hovering over each tool gives its name and functions.
Options Bar- This is located just below the Menu bar. It varies according to which tool you are using. As an example, when you select the Brush tool, the options bar will display settings for brush size, opacity, and hardness.
Layers Panel- On the right-hand side, the panel is useful to manage various design elements on different layers. Layers are practically edited non-destructively, meaning you can go ahead and make changes without actually touching the original image.
Properties and Adjustments Panel-this is used to do minor image fine-tuning such as brightness, contrast, hue/saturation, etc.
History Panel-This records all that you do in Photoshop, thus allowing you to undo your steps if need be.
3. Opening and Saving Images in Photoshop to edit Photos
After familiarization with the interface, it is time to open and save images.
Opening An Image
Click File > Open and select the image from your computer.
Alternatively, drag-drop an image right into Photoshop.
The image opens as a new document, ready for editing.
Creating A New Document
If you want to begin everything from scratch:
File > New.
Select your desired dimensions (width, height, resolution).
Select background contents (white, transparent, or a custom color).
Saving Your Work
Saving a file becomes quite critical after having done some editing. Some of the file-saving options available in Photoshop will include:
PSD (Photoshop Document): Keeps layers for future editing.
For JPEGs: Saving of high-resolution images meant for sharing or printing.
PNG: For transparent background images or images for the web.
TIFF: High-resolution images with lossless quality.
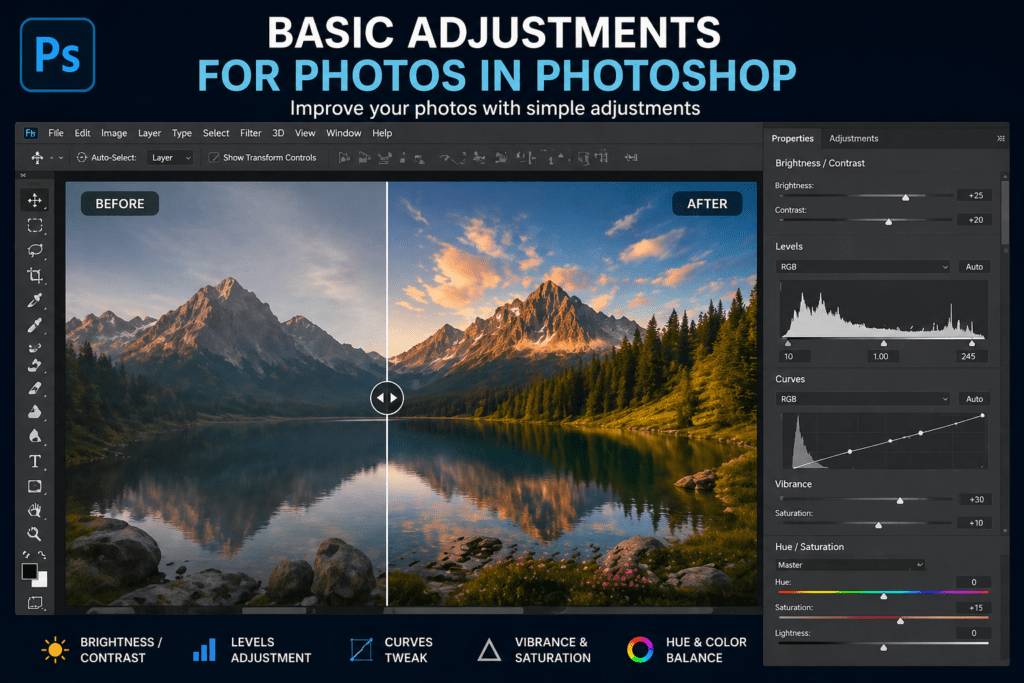
Basic Adjustments in Photoshop to Edit Photos?
Basic adjustments intended to enhance general image quality are among the first processes in photo-editing. These include cropping, resizing, brightness, contrast, and color correction. Below are some essential tools and methods to start you with basic photo editing.
1. Basic Photo Adjustments in Photoshop to edit Photos
Cropping and Resizing Images
Cropping an Image
The purpose of cropping images is to remove the unnecessary parts of an image and to have improved composition. The steps are as follows:
Open the image in Photoshop.
Select the Crop Tool from the toolbar (shortcut C).
Drag the corners of the crop box to select the area that should be retained.
Press Enter or click on the checkmark above the tool settings to crop the image.
Go to Image Image Size (shortcut Alt + Ctrl + I on Windows, Option + Command + I on Mac).
Enter the width and height appropriate for your purpose in pixels, inches, or centimeters.
Select Resample if you want to compromise on the quality of the image while resizing.
Click OK to apply changes.
2. Brightness, Contrast, and Exposure Adjustments
The brighter and more contrasting an image becomes, the better it looks. Brightness/Contrast Image > Adjustments > Brightness/Contrast. Using the Brightness slider, you can lighten or darken the image. Using the Contrast slider, you can adjust the contrast between dark and light areas. When satisfied, click OK to apply your changes. Exposure Adjustments Exposure boosts underexposed (too dark) or overexposed (too bright) results.
Image > Adjustments > Exposure. Use the Exposure slider to set the overall brightness. Use the Offset and Gamma Correction sliders for finer controls. When satisfied, click OK to apply changes.
3. Apply Auto Adjustments
Photoshop has a set of basic automatic correction techniques that go a long way to improving images: Auto Tone: alters the overall tone and contrast of the image.
Auto Contrast: enhances the difference between dark and light areas.
Auto Color: corrects imbalances in color found in the image. To use one of these: Choose Image from the top menu.
Click on Auto Tone, Auto Contrast, or Auto Color to see immediate adjustment. Further manual adjustments can be made if required.
4. Color Enhancement using Hue, Saturation, and Vibrance
Hue and Saturation Adjustment This tool gives great power in changing colors and ramping them up.
From there, you can go to Image > Adjustments > Hue/Saturation or use shortcut Ctrl + U on Windows and Command + U on Mac.
The Hue slider changes colors along the spectrum set. With the Saturation slider, increase or decrease the intensity of a color. Then hit OK to save the changes. Adjusting the Vibrance In contrast to Saturation, Vibrance adjusts only the subdued colors while leaving the very bright areas as they are. Image > Adjustments > Vibrance.
Alter the Vibrance slider to reduce or boost color intensity.
Click on OK to save the changes.
Using Layers and Masks in Photoshop to edit Photos
Layers and masks in Photoshop are ways of editing things in a non-destructive manner and adjusting anything without keeping your original image permanently altered. The knowledge of use can totally change your photo editing methods.
1. Layers in Photoshop to edit Photos
Layers are transparent sheets that stack on top of one another, allowing every layer to contain an element-a part of the image. Editing becomes easy for a specific part of the image without affecting the integrity of the rest of the composition.
Types of Layers:
Background Layer-a default layer that automatically opens when you open an image-it is locked by default.
Adjustment Layers-non-destructive coloring and lighting changes.
Text Layers-made when you add text to an image.
Shape Layers-a vector-based graphic creation.
Smart Objects-maintain quality even when resizing or transforming.
Basic Layer Operations:
To Add a New Layer, Click on the “New Layer” button at the bottom of the Layers panel or Shift + Ctrl + N (Cmd + Shift + N for Mac).
Reorganizing Layers: In the panel, drag layers up or down to change their arrangement.
Duplicate Layers: Right-click on a layer and select Duplicate Layer to make a copy.
Merge Layers: Select multiple layers, right-click, and choose “Merge Layers” to combine them.
Deleting Layer: Select the layer and press Delete or drag to the trashcan.
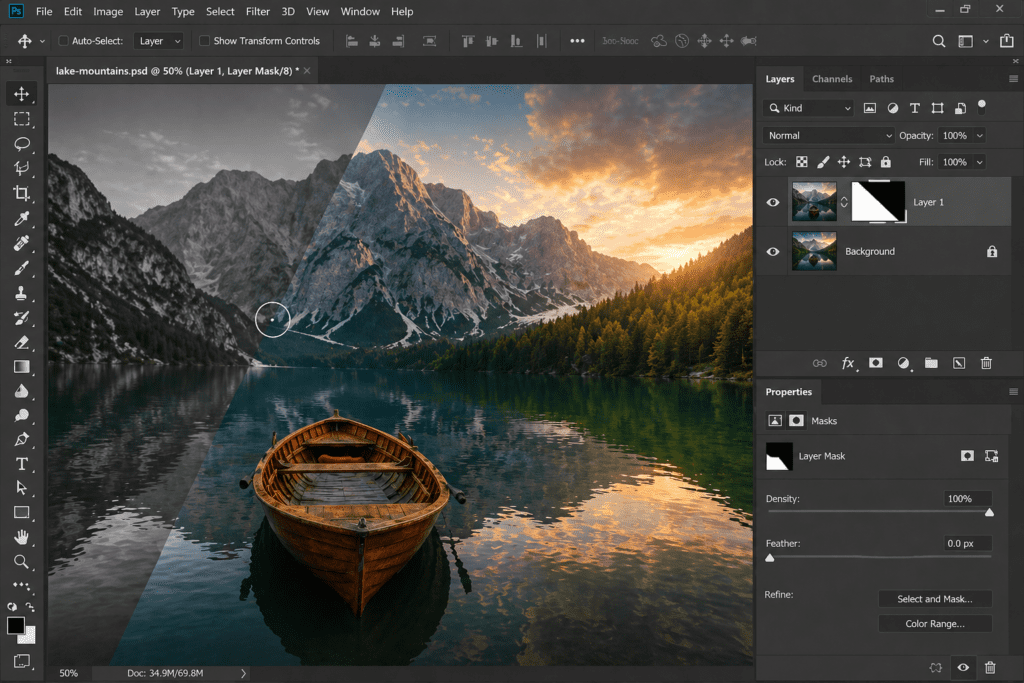
2. Layer Masks: The Non-Destructive Way to Editing
Layer masks make it feasible to conceal or expose areas of a layer without actually smashing a pixel. This is particularly helpful for cutting edges, readjusting, and removing backgrounds.
How to Apply a Layer Mask:
Select the Layer you want to add a mask to.
Then on the bottom of the Layers panel, click the Add Layer Mask button.
A white thumbnail will appear next to the layer-it is your mask.
Using a Layer Mask:
Black Hides, White Reveals-Painting with black will hide certain areas of a layer while painting with white will make them visible again.
Soft Edge Blend-Smooth the layer transition using a soft brush.
Gradient Mask-A gradient applied on a mask can be used to seamlessly blend two images together.
3. Advanced Layer and Mask Techniques
Clipping Mask: It limits the view of one layer based on other layers. Eg: Alt + Click between two layers.
Blending Modes: Use different combinations to achieve unique applications for layer blending.
Smart Filters: Convert layer to Smart Object for application of non-destructive filters.
With good mastery of layers and masks, it makes your editing fully in your control, flexible and professional.
Touch-up and Enhancement of Photos on Photoshop
Photo retouching is one of the most important steps in photo editing as it helps in enhancing the natural beauty of the photo while correcting the flaws. Photoshop has various tools to polish the photo, as well as remove blemishes and make them appealing without letting the photo look unnatural. Here’s a below guide that will take you through a step-by-step process on how to retouch and enhance your photos like a professional.
1. Removing Blemishes and Imperfections
Photoshop to edit Photos ,Small imperfections such as pimples, wrinkles, and dust spots can spoil an otherwise perfect image. Photoshop has many tools to fix minor problems like these:
a) Healing Brush Tool
This is the fastest way by which small blemishes can be erased: Spot Healing Brush Tool (shortcut – J). It automatically samples surrounding pixels to create a totally seamless correction:
1) Select the Spot Healing Brush Tool from the task bar
2) Adjust the brush size to be slightly larger than the blemish
3) Click on the imperfection, and Photoshop will replace it with surrounding skin texture.
b) Healing Brush Tool
For more control, use the Healing Brush Tool, which allows you to manually sample an area before painting over imperfections.
Select Healing Brush Tool (J).
Hold Alt (Windows) / Option (Mac) and click on a clean skin area to sample it.
Paint over the blemish to blend the correction.
c) Clone Stamp Tool
The Clone Stamp Tool, S, works almost identically to the Healing Brush, except it doesn’t automatically blend in, but rather transfers pixels from one area to another.
Color Correction and Adjustments
This entire procedure of color correction is most vital in photo editing for natural and balanced-looking colors in the images. There are many different types of color-adjusting tools in Photoshop to help you fix any lighting problems with the color and enhance presentations for your photos.
1. Adjustment of Hue, Saturation, and Vibrance
Hue/Saturation Adjustment
Go to Image > Adjustments > Hue/Saturation or hotkey Ctrl + U (Cmd + U for Mac).
Dragging the Hue slider will shift the colors.
Increase or decrease Saturation to increase or decrease color intensity.
Lightness: Brighten or darken the colors by dragging the Lightness slider.
Vibrance Adjustment
Select Image > Adjustments > Vibrance.
Vibrance serves to increase levels of muted colors while having little effect on already saturated colors.
Vibrant is somewhat similar to Saturation, but it still provides more of a natural enhancement.
2. Color Balance that Works
Image > Adjustments > Color Balance (Ctrl + B for Windows users; Cmd + B for Mac users).
The sliders for Shadows, Midtones, and Highlights can be adjusted to add or remove color casts.
Making the photo warm can be done by increasing red/yellow tones or making it cold by inserting blue/cyan tones.
3. Use of Curves and Levels
Curves Adjustment
Go to Image > Adjustments > Curves (Ctrl + M).
Using the mouse, click on the curve and drag the points to brighten or darken some tonal ranges.
Create an “S” curve to increase contrast.
Levels Adjustment
Go to Image > Adjustments > Levels (Ctrl + L).
Shadow, midtone, and highlight values can be adjusted by moving the black, gray, and white sliders, respectively.
Helps in overcoming or restoring underexposed or overexposed photos.
4. Selective Color Adjustments
Image > Adjustments > Selective Color.
Adjust some colors (Reds, Yellows, Blues…) without affecting the rest of the image.
Buy tones for enhancing small skies in bluer tones or creating more natural colors for skin.
5. For Color Grading-the Camera Raw Filter
Filter > Camera Raw Filter (like Lightroom).
Adjustment of White Balance, Temperature, Tint, and Color Grading.
Good color correction for professional use.
Text and Graphics in Photoshop
Adobe Photoshop can very well add text and graphics to images, thereby giving results beyond photo editing. Whether you are working on a social media post, a marketing material design, or digital artwork, Photoshop gives you total freedom in the way you do text styles, shapes, and other visual elements.
1. Add Text to Image
Using the Type Tool in Photoshop
The Type Tool (T) in Adobe Photoshop permits you to enter text into an image and to manipulate it easily as follows:
- Select the Type Tool from the toolbar (shortcut: T).
- Click anywhere on your image and start typing.
- Use the Options Bar at the top to change the font, size, color, and alignment.
- To move the text, use the Move Tool (V) and drag it to your desired position.
- If you want to edit the text later, you just select the Type Tool and click on the text.
Font Selection – Browse through thousands of fonts included in Photoshop, or upload any font of your choice.
Character and Paragraph Panels – They help one to set line space, kerning, and alignment to make reading easy.
Layer Styles – Shadows, strokes, glows, and similar effects can be applied to give that extra punch in the text.
Text Warping – This uses the Warp Text tool found in the Type Tool options to warp text curved or otherwise distorted.
2. Creating and Using Shapes
The Shape Tools are all designed to let you add geometric or custom vector shapes to any design; they can be used for backgrounds, dividers, logos, or just decorative elements.
To add a shape:
Select the Shape Tool (U) from the toolbar.
Select from one of the available shapes (Rectangle, Ellipse, Triangle, Polygon, Line, or Custom Shape). Click and drag on the canvas to create your shape.
Edit using the Properties Panel: size, fill color, stroke color, and border thickness.
Customizing Shapes
Properties Panel or the Options Bar: Change Fill Color.
3. Professional Designs Using Text and Graphics
Text and graphics can work together to create appealing images. Here are the ways to make your pictures better.
Using Clipping Masks- You can then put your image inside text by creating clipping masks. This can be achieved by putting an image layer on top of the text layer and pressing Alt + Click in between the two layers.
By Using Some Paint Effects, Blend the Text with the Images- This will allow the text to blend easily into the background.
Include 3-D Text Effects- This is available in the 3D Text Tool inside the Window > 3D panel of Photoshop. This can create very realistic 3D text ideal for posters or advertisements.
Exporting and Saving Your Edited Photos in Photoshop
The final step after you have used every technique possible to perfect your photo in Photoshop is to export and save it in the most appropriate format. The right file type, resolution, and options will ensure that your edited image will look fabulous-either to the world, social media, private viewing, or professional services.
1. Understanding File Formats.
Saving and exporting images in different formats is another feature of Adobe Photoshop. Each of these types serves a particular purpose.
JPEG (.jpg)-well suited for its use in both web and social media, this has an acceptable compromise for decent quality and file size.
PNG (.png)- This is suitable for images with transparent backgrounds and high-quality files for web usage.
PSD (.psd)- This is the basic format in Adobe Photoshop, preserving layers for future editing.
2. Adjusting Image Resolution.
For web use, an image will have a resolution of 72 PPI (pixels per inch) to load fast.
If printing, 300 PPI will keep the detail good.
We can change the resolution as needed by going to Image > Image Size.
3. Using the ‘Save As’ Option.
When you want to save an Image file while leaving an editable version of your work:
Click File > Save As
Select PSD if you want to edit that file later.
Select another format such as JPEG or PNG for final use.
Set the quality settings for JPEG (high quality for best results, lower quality for a smaller file size).
5. Organizing Your Files.
Give images descriptive names to locate them easily afterward.
Keep your original PSD files in a designated folder.
For data safety, back up files onto external drives or cloud storage.
Conclusion Photoshop to edit Photos
Photoshop is a powerful tool with endless scopes for any simple modification to give it a high-end professional finish. It has something for everyone, whether you are just starting out or an experienced designer. Just practice these few techniques, and you will impress yourself in creating beautiful images. Practice, practice, practice. Get into the habit of playing with different tools, browse through tutorials, and then finally find your editing style which will help in making your images unique.