
Best Beginners Guide to Photoshop Tools in 2024
Adobe Photoshop tools are raster graphics editor developed and published by Adobe for Windows and macOS. It was originally created in 1987 by Thomas and John Knoll. Since then, the software has become the most used tool for professional digital art, especially in raster graphics editing. Owing photoshop tools to the fame, the program’s name has become genericized as a verb (e.g. “to photoshop an image”, “photoshopping”, and “photoshop contest”) although Adobe disapproves of such use.
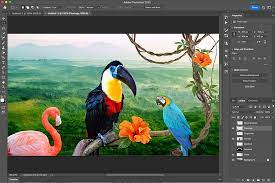
Photoshop tools and functions to navigate the canvas.
Photoshop tools are roughly categorised into seven different types arranged in the Options bar — which is a lot. But, if you break it down simply, there are only a few classes of tool: ones that help you measure, select and move around your work and ones that help you to modify the pixels on your canvas.
1.Retouch for instant style.
Choose from hundreds of themes and eye-catching effects that you can apply in an instant to express your creativity or amp up your message. Add more style to your images with borders, layouts and backgrounds.
2.Create and edit images that make an impression.
Photoshop Express gives you everything you need to quickly edit and transform images so they stand out on social and everywhere else. And with the option to add premium features, you can make advanced edits in a snap with photoshop tools.
3.Make color pop with Photoshop tools .
Polish your shots with intelligent tools that take care of complex tasks like cutouts, dehazing, retouching and noise reduction. Make selective edits to two things at once to create eye-popping effects. And apply Fused Looks to change just the foreground or background of your image.
4.Edit, collage and add makeup in-app.
Create a scrapbook collage effect in seconds with our free automatic cutouts. Retouch photos with makeup transfer and skin smoothing presets. And make even more advanced healing edits with our premium features.
5.Discover your community.
Watch playbacks in the Discover feed to see how someone created a look you like and then apply the same edits to your own photos. Post favourites directly to social media sites or messaging apps to inspire others.
The Photoshop tools in toolbar
Photoshop’s toolbar is located along the left of the screen:
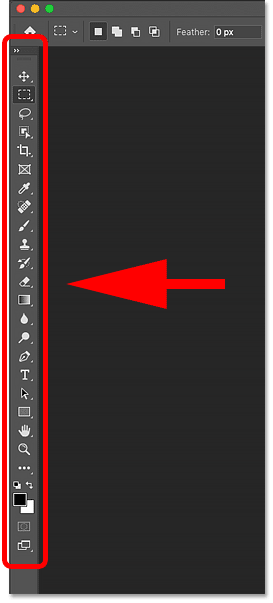
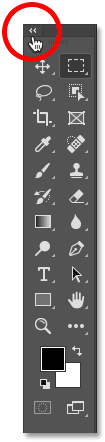
Choosing a single or double column toolbar
By default, the toolbar appears as a long, single column. But it can be expanded into a shorter, double column by clicking the double arrows at the top. Click the double arrows again to return to a single column toolbar:
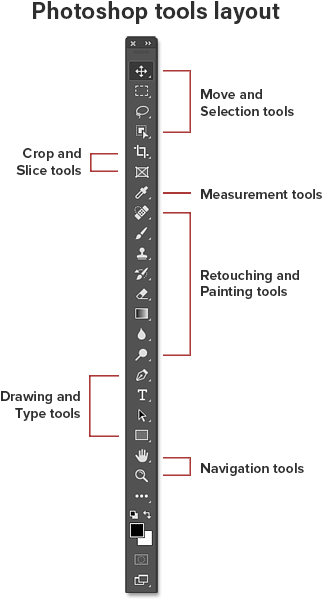
The photoshop tools layout
Let’s look at how Photoshop’s toolbar is organized. While it may seem like the tools are listed randomly, there’s actually a logical order to it, with related tools grouped together.
At the top, we have Photoshop’s Move and Selection tools. And directly below them are the Crop and Slice tools. Below that are the Measurement tools, followed by Photoshop’s many Retouching and Painting tools.
Next are the Drawing and Type tools. And finally, we have the Navigation tools at the bottom:
The toolbar's hidden tools
Each tool in the toolbar is represented by an icon, and there are many more tools available than what we see.
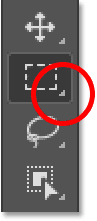
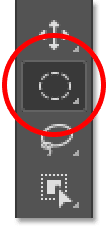
A small arrow in the bottom right corner of a tool icon means that there are more tools hiding behind it in that same spot:
Most of the spots in the toolbar hold more than one tool:
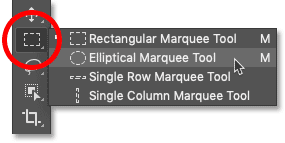
To view the additional tools, click and hold on the icon. Or right-click (Win) / Control-click (Mac) on the icon. A fly-out menu will open listing the other tools that are available.
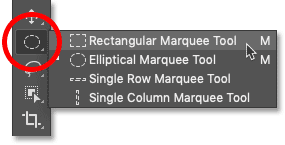
For example, if I click and hold on the Rectangular Marquee Tool icon, the fly-out menu tells me that along with that tool, the Elliptical Marquee Tool, the Single Row Marquee Tool and the Single Column Marquee Tool are also grouped in with it.
To choose one of the additional tools, click on its name in the list. I’ll choose the Elliptical Marquee Tool:
The default photoshop tools
The tool that’s initially displayed in each spot in the toolbar is known as the default tool. For example, the Rectangular Marquee Tool is the default tool for the second spot from the top. But Photoshop won’t always display the default tool. Instead, it will display the last tool you selected.
Notice that after choosing the Elliptical Marquee Tool from the fly-out menu, the Rectangular Marquee Tool is no longer displayed in the toolbar. The Elliptical Marquee Tool has taken its place:
To select the Rectangular Marquee Tool at this point, I would need to either click and hold, or right-click (Win) / Control-click (Mac), on the Elliptical Marquee Tool icon. Then I could select the Rectangular Marquee Tool from the menu:
The Quick Selection Tool
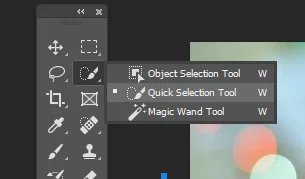
The Quick Selection Tool allows you to select objects by concentrating on the edges. Just drag the tool over the object to select it. The Magic Wand Tool makes a selection based on the part of the object where you click your mouse.
The Lasso Tools
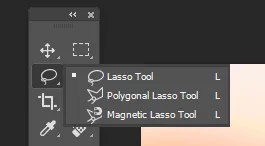
You can also make selections using the lasso tools. The Lasso Tool lets you make a selection around anything on a layer just like you would if using a real lasso.
The Polygonal Lasso Tool also lets you select an area but only by making, straight lines.
The Magnetic Lasso Tool allows you to select an object by trying to find the edge of the object and assigning anchor points like you are using a magnet to attract the points.
The Spot Healing Brush/Healing Brush/Patch Tool/Content-Aware Move Tool/Red Eye Tool
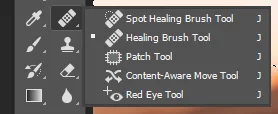
The Spot Healing Brush lets you remove imperfections. It looks at the area around where you click the mouse in order to blend the imperfection into the image.
The Healing Brush Tool also lets you eliminate imperfections in an image. And You have to select a point on the image, unlike the Spot Healing brush.
The Patch Tool lets you make a selection as the Lasso Tool does. You can drag the selection to the area in order to fill it with the selection.
The Content-Aware Move Tool looks at any content selected to be moved and tries to fill in the area from which the selected content has been moved. For example, if you move a window from a house in an image, Photoshop will try to fill in the empty area with content from the rest of the house,as if the window had never been there.
The Red Eye Tool is a way to quickly remove areas that have red eye from improper flash lighting.
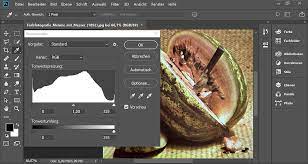
Before and after example of the Spot Healing Tool, notice how the lens flare inside the rock has faded significantly:
The Brush Tool
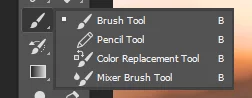
The Brush Tool is a very important tool; you’ll probably use the Brush Tool the most if you are retouching images. The Pencil Tool lets you draw on an image as if you were using a real pencil. The Brush Tool using the colour selected by the Eyedropper Tool. In the example below, a yellow panel of the balloon was selected and used as a brush.
The Clone Stamp Tool
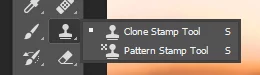
The Clone Stamp Tool is used to clone or copy image information from one area to another. And You can hold the Option/Alt key and click an area of an image. Then, click the image to brush with the color and image information that you sampled.
The History Brush Tool
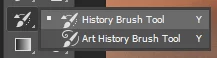
This tool is like an Undo feature. You can use it to step back until you return to the desired change.
Here is an example of using the History Brush Tool from the previous tool, the rock has been returned to its original shape on the left but stayed large on the right. This is due to it being History Brushed away on the left only.
The Eraser Tool/Background Eraser Tool/Magic Eraser Tool
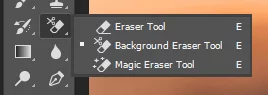
The Eraser Tool removes undesired detail just like a real eraser.
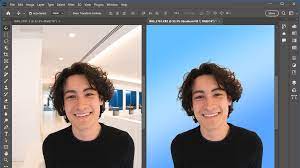
The Background Eraser Tool lets you remove the background from an image. Drag the eraser along the edges of an image and its background in order for it to remove the background.
The Magic Eraser Tool can remove part of the background of an image depending on the area you select.
Zoom Tool

The Zoom Tool is used to magnify a portion of your image when you are doing detailed work. Click and drag a selection of an image and Photoshop will zoom in on that area.
A summary of Photoshop tools
So now that we’ve learned how Photoshop’s toolbar is organized, let’s look at the tools themselves.
Below is a quick summary of each of Photoshop’s tools, along with a brief description of what each tool is used for. The tools are listed in order from top to bottom, and specific tools are covered in more detail in other lessons.
An asterisk (*) after a tool’s name indicates a default tool, and the letter in parenthesis is the tool’s keyboard shortcut. To cycle through tools with the same keyboard shortcut, press and hold Shift as you press the letter.